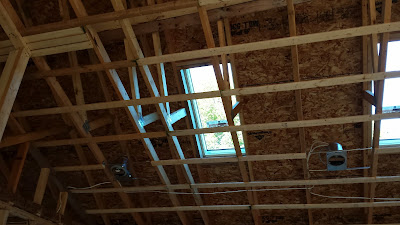
Trusses Looking Over the Master Bedroom Towards the Living Room
The View Towards the Dining Room

Over the Hallway Towards the Guest Bathroom
The light (dot) at the end of the Tunnel is the Future Bathroom Vent
Living Room Ceiling with Skylights Ready to be Boxed In
From the Kitchen Towards the Living Room
That's the Vent Pipe for the Kitchen Fan
The Gang Nail Truss Plates tie the Trusses Together
Close Up of the Gang Nail Truss Plates
Don't try these at home - special machines are used to press
them into the truss chords
A Tie is used to Connect the Truss to the Top Plate of the Wall
These Ties keep the Roof from Lifting Off in a Hurricane
With the
rough wiring and plumbing completed I thought I’d take a few pics of the
trusses before they are covered with insulation and then sheetrock.
It’s amazing
to see the intricacy of their engineering. By themselves, the chords of each
truss would only hold so much weight. But when tied to together at the right
angles and lengths they can hold so much more weight. I suppose there are
advantages and disadvantages of using trusses versus roof rafters, but I don’t
know what they are. I do know we’ve got great roof lines on the outside and a
great cathedral ceiling on the inside in the Living Room.
There is also an opening so I can go up in the
attic if I needed to. But I can’t think of any reason why I would. We have
plenty of storage in the house so my plan is to never need to put anything up
there. Except for maybe a candle light or a Santa at Christmas or a witch at
Halloween in the window of the fake room (Wait? What? Yes, it’s to break up the
roof line and there isn’t a room up there.)
At any rate,
I just wanted to share a few pics so you can see what trusses look like in
place.
Enjoy your
day


